

To deactivate Instagram or delete it: that is the question. If you’re reading this article, you’ve probably decided that it’s better to take action against
the sea of troubles
associated with the Meta-owned app and other social networks (like body dissatisfaction and
unhealthy life comparisons
) than it is to suffer the slings and arrows of outrageous trolls. No more.
Both deactivation and deletion will remove your Instagram account from the public eye, but the choice you make will depend on whether you plan to come back to the ‘Gram at any point. The key difference between a deactivated account and a deleted one is that the latter is permanent. If you deactivate your Instagram, it won’t be visible to anyone, but you won’t lose anything. You can let it languish in virtual limbo forever, or recover and reactivate it at any time by simply logging in. Delete it, though, and Meta will erase everything—you won’t be able to get it back.
Consider downloading your Instagram data first
Before you start, we recommend downloading all your Instagram data. You don’t need to do this, but if you’re at all nostalgic for the time you spent on the app, you should stash a file full of your posts, comments, and everything else on a hard drive somewhere. Not interested? Cool—you can
skip straight to our instructions on how to deactivate Instagram
.
Download your Instagram data from the app
1.
Tap your
profile
photo
in the bottom right corner of the screen, then hit the
hamburger menu
(three lines) in the top right.
2.
Touch
Your activity
to open up a categorized
list
of everything you’ve ever done on Instagram.
Screenshot: Instagram
3.
Scroll to the bottom of this list and tap
Download your information
.
4.
Click
Request a download
on the next page. When the file is ready, Instagram will notify you and give you four days to download your information from the app.
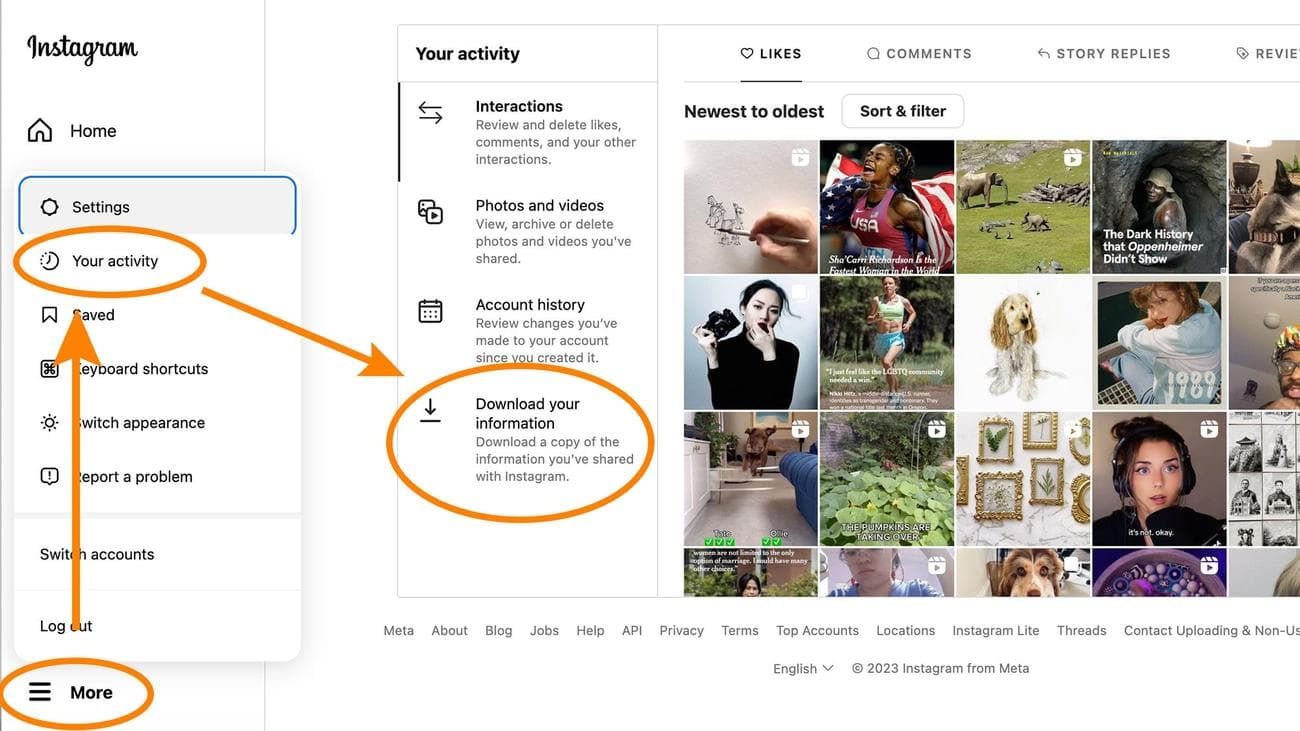
Download your Instagram data from the web
1.
We know the app is more easily accessible, but plenty of people prefer the web version of Instagram. If that’s you, click
More
in the bottom left corner of the screen, then hit
Your activity
.
[Related:
Criticism pushed ‘Instagram
Kids
‘ back to the drawing
board
]
2.
Select
Download your information
, then enter the email address you want Instagram to send the file to.
Screenshot: Instagram
3.
Choose the file format you want:
HTML
or
JSON
. The latter is a better option if you want to transfer all your Instagram data to another program or service.
4.
Enter your Instagram password, then hit
Request download
.
How to deactivate Instagram, or permanently delete it
Whether you’re using a phone or a computer, the steps to delete or deactivate your Instagram account are essentially the same, but the first few are different enough to warrant separate instructions. When you’re done, maybe you’ll sleep—perchance, dream—a little easier. And then you can consider deleting Facebook when you wake up.
How to delete or deactivate Instagram from the Android or iPhone app
1.
Tap your
profile photo
in the bottom right corner of the screen, then the
hamburger menu
(three lines) in the top right.
2.
Choose
Settings and privacy
, then
Accounts Center
. These options should be easy to find, as they’re both right at the top of their respective lists.
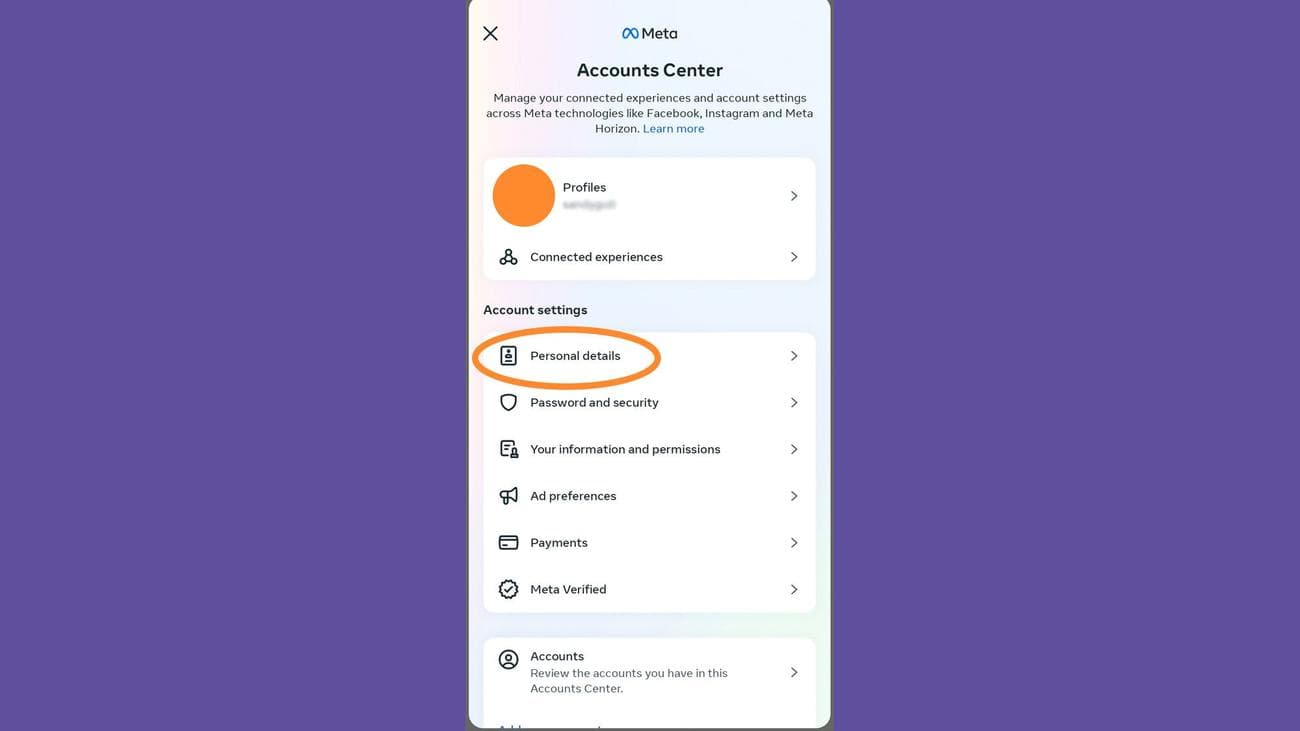
3.
From the Meta Accounts Center, tap
Personal details
>
Account ownership and control
>
Deactivation or deletion
.
Screenshot: Instagram
4.
Pick
your Instagram account
from the list of Meta accounts.
5.
Choose whether you want to delete or deactivate your Instagram account, then hit
Continue
and enter your Instagram password to finish the process.
How to delete or deactivate your Instagram account from the web
1.
Click
More
in the bottom left corner, followed by
Settings
.
2.
Find the Meta Accounts Center box, then click
See more in Accounts Center
.

Screenshot: Instagram
3.
Once in the Accounts Center, click
Personal details
>
Account ownership and control
>
Deactivation or deletion
.
4.
Select
your Instagram account
from the list of Meta accounts that appears.
5.
Pick whether you want to delete or deactivate your account, then hit
Continue
and enter your password to finish the job.